Showing posts with label Annie Sloan Chalk Paint. Refinishing. Show all posts

Friday, March 2, 2012

Little Projects


Hi Everyone! I hope that your week has been fruitful and fabulous!

I found a frame at the local thrift shop and brought it home. I read that you can use the chalk paint right over the glass, so that is what I did.

I painted the frame Old White by Annie Sloan--two coats. Of course I had to tape it so that one paint didn't mess up the other. Let it cure for a couple of days and then it is ready to put whatever message you want.


I found some inexpensive but nice quality napkins at one of my favorite stores: Home Goods. These 12 napkins, mostly cotton, were under $12!

I ironed and folded them first. Then I got this image from someone online, sorry I forgot her blog site. Ultimately, it came from Graphics Fairy.


I am so happy with them. I used iron on transfer paper and I love how it works! All you do is line it up, and iron with a dry hot iron for 2 minutes, let cool and then peel off.
Oh, and you have to reverse your image when you print it.

Thanks for looking! Hope you have a peace and wonderful weekend, my friend!


I am linking up with these parties:

Saturday, January 14, 2012

Part 2 of my sewing table - FINI!


Hi Blogging Buddies! Although this table didn't quite turn out the way I expected, I learned a few things.

1. Nothing is as easy as it seems.


2. Citra Solve, a great product, doesn't do well on painted wood. When I used it to transfer a laser print, it actually "bubbled" the paint. That is a technical term. You knew that.
And  the ink ran, a lot.


3. Listen when a fellow blogger says she doesn't think that a laser print will work well on painted wood. I never listen...I just go ahead and do it anyway. I know, I am not too smart.


4. Distressing and a little dark wax can hide a multitude of errors.

Since the transfer was really pale, I had to use a paint pen to fill in the letters.
For the girl with her dress pattern, I had to go to Hobby Lobby and find a fine point artist pen and painstakingly go over each little line that I could detect. And it didn't look too bad. 


It is good to learn from your mistakes, right?

Now, on to those chairs in my sun room next!  See you soon!

Have a wonderful weekend!

♥charlotte

Thursday, January 5, 2012

My table reveal!


Hi Everyone! And happy Thursday to you all!

I was given this end table by my good friend, Paula. It was in terrible shape and sadly
 I deleted the photos showing the befores. It has been forever in finishing this, sometimes the weather got in the way. As you may know, if it is too cold or too humid...not a good time to paint.

My resolution for 2012 is to be more careful in recording the steps of the process.

Believe me when I say that it was awful. All scratched and dirty with spider eggs hiding inside the doors. But a good cleaning took care of that.

1. First step was to remove all the hardware...makes it easier to sand it.

2. Starting with a 80 grit sandpaper and a palm sander, I sanded down most of the scratches, top, sides, doors.

3. Switch to a finer grit, like 150-220 and smooth out the wood. If you run your hand over it, you will not feel any rough spots.
4. Now you need to remove all the sanded particles by using a tack cloth. They are very sticky and pick up all the dust. Once you  have it cleaned, you are ready to paint.

5. I had some Old White Annie Sloan chalk paint, but not enough. So i went to Lowe's and had them try to match it. Didn't really match that well, had a lot more yellow in it than Old White. But I got it anyway and painted the table with it, sanding between the two coats.

6. I transferred words on it, using graphite paper.I used the Chopin script font, which is one of my favorites.

7. New to me, I tried Mod Podge to adhere some pretty graphics from  Graphics Fairy.
 It worked pretty well, I guess, for my first time. But I am not sure that decoupaging is for me. But I will give it another try. Don't ask me why I chose bird graphics, especially owls. I just thought they were pretty, I guess.

8. Last of all I finished the table by putting a coat of water based polyurethane on it.


top with love bird graphic


Right door panel

Left door panel
 What do you think? What would you have done differently? I am still learning and having fun but would appreciate some constructive critiques.

Thanks for stopping by...so nice to see you!

♥charlotte

Linking to: Common Ground - Vintage Inspiration Friday  
French Country Cottage - Feather Nest Friday 
At the Picket Fence - Inspiration Friday 
2805 - Potpourri Friday
The Charm of Home - Home Sweet Home
My Repurposed Life - Catch as Catch Can


Photobucket"


Friday, October 21, 2011

My re-do of my $1.25 coffee table


Well here it is, friends. My coffee table bargain. I didn't think I would ever get through! I ran out of Old Ocher Chalk Paint so put some on an index card (actually my hubby did it) and took it to Lowe's to match it in latex paint. They didn't quite get the right color and I didn't realize it until too late. We need better lighting in the garage. Sigh..


I don't have the distressing down very well either. But I will try again soon with some old tables that a friend gave me recently.


There are so many talented people out there in blog land. Here is one who was my inspiration for the writing on the table:


Go Here


I had searched all over the web to find instructions on how to get lettering on without doing it free hand. Katie had the best solution. She uses graphite paper that you can get at Michael's. I had Kinko's enlarge my script to fit the table.


 I took this off before I took a picture


  You have to really be careful with the graphite paper. It transfers really easily and if you press in the wrong place, you will have a lot to clean up. I know. I did.


This is how it looked after tracing each letter. Later I filled in each letter with a black paint pen. It was just like coloring in a coloring book.


This is the before picture.


After. Whaddya think?
 I am linking up to these parties.
Furniture Feature Fridays
Redoux

Beyond The Picket Fence


Thanks for visiting. Please come again!

Peace and love,

♥Charlotte


you are talking too much />

Saturday, October 15, 2011

I am rich! And coffee table update


I have lived in poor situations, like when I only had a dollar to get a cup of coffee and a cream cheese sandwich on raisin bread for lunch, when working in NYC. 

And I have lived in great abundance; feasting on caviar and champagne and going about in limousines and traveling to great places, meeting "important" people.

Now, happily I am somewhere in between. But when the pay check comes in, I get a kick out of getting my supplies at the dollar store. I have always looked at liquid soap as something for rich people. I know, I am behind the times. So getting some bottles for a dollar each thrills me. I am not hard to please. It makes me feel rich.

Growing up the eldest of ten children, I rarely had anything of my own. My father was in dental school; mother worked as a registered nurse. There was not much money in our family. Dinner was usually cooked by my Dad, as my mother would be on her shift.
Sliced fried spam, scrambled eggs and peas and carrots are what I remember. That and some sort of sandwich spread of salad dressing with pickles on wonder bread. 

And for some reason, I craved the front yard dirt. I read now, that it has something to do with a mineral deficiency.

Clothing was handed down from my cousins, which we were happy to get. Once a year, mama would buy us each a dress and a pair of shoes. I hardly wore mine because I wanted to keep it "good". What a waste. But habits die hard. I still have a hard time wearing something new before hanging it and admiring for a while.

So you see, I am delighted to go to the dollar tree and have some riches for my own enjoyment. It makes me happy!

"for I have learned, in whatever state I am, to be content. I know how to be abased, and I know how to abound; in any and all circumstances I have learned the secret of facing  plenty and hunger, abundance and want. I can do all things in him who strengthens me."
Paul: Philippians 4:11-13

Coffee Table Update

I hit a snag in my table redo. After painting and sanding, I got out the glaze and accidentally put in on without diluting it. It grabbed in certain places and I just didn't like the looks of it. So I sanded it back down and repainted.


See where it kind of settled in looking patchy?

I sure never thought that this would take that long but I guess sometimes it will. I am working on it today.

Hope you are having a good weekend! Take care.

♥Charlotte

Monday, October 10, 2011

My $1.25 coffee table


Have you missed me? I have missed you! I thought that after I got this table I would amaze you at my first attempt to really refinish a piece of furniture. I just didn't think that it would take this long!
First of all I must tell you that Jim and I went out garage sale hunting 2 weeks ago around closing time.and found the table above and it was half price. The original price was $2.50. We picked up this treasure for $1.25! It is very heavy and I don't think they wanted to drag it back into their house.


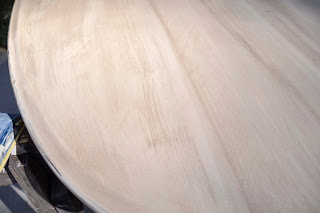
As you can see, it is very heavily scratched and has a heavy varnish on it. So I started right away to sand the top, a LOT! Jim found that it would be easier to just take the table apart so that I could get to the bottom shelf easier. So far, I have painted the bottom shelf, "Old Ocher" by Annie Sloan Chalk Paint. Because I had some left over from my last project.


Here is another view of the top.

Today, I will complete the legs and then get to distressing and finishing it up. In the meantime here are some photos of the seasonal changes:


Did I disappoint you by showing you just "before" pictures of my coffee table? I am sorry.
Please come back later and I promise, it will be worth it. At least I hope so. :o)

May the peace and love of Jesus be with you all today!

♥Charlotte